
The long, hot and dry summer of 2018 convinced Kate Harrison – Chair of Seedy Sunday – that she needed to find a new way to help the plants on her Weald allotment survive drought. Here she explains the principles of Hugel beds and shares her first hand experience of creating one over the course of a year.
I had a large pile of woody debris on my allotment, which I’d normally try to compost, tuck into hedges or, as a last resort, burn. I also had some big logs from a tree which had been cut to size near my plot. In the early weeks of 2019 I thought I’d try a different approach and incorporate this woody ‘waste’ into a Hugel bed. I’d heard of ‘Hugelkultur’ from Permaculture Magazine. The idea is that the buried wood rots down and acts as a sponge to retain and slowly release water, also slowly releasing its nutrients over many years. This little animation, and other articles, were really useful guides.
How to Hugel:


Images by Kate Harrison: From Left to Right from top left: Steps 1-11.
- Step 1: I began by mapping out an area about 1 metre wide by 2 metres long.
- Step 2: I dug a trench about 30 cm deep with a pick-axe and shovel, keeping the earth for later use. I filled this trench with the heaviest logs and rotting branches
- Step 3: I continued to fill the trench and heap up the branches and woody stuff.
- Step 4: Quite fun to stamp on the heap to compress it!
- Step 5: I began layering on the topsoil I’d dug out when making the trench.
- Step 6: The instructions suggest pushing sticks vertically into the pile to stabilise it. This seems to have worked well so far. I also watered it liberally as I went along.
- Step 7: We ended up with quite a big heap of layered branches and topsoil. At this point bystanders asked us what, or who, we had buried there. Note the ivy – I’d cut quite a lot back. I was worried it would all sprout out of the bed in the Summer, but this didn’t happen. A few bits came up at the edges, but nothing major.
- Step 8: The heap is topped off with a generous layer of compost. I planted lots of pea seeds. This is because the rotting wood initially takes nitrogen out of the soil, and peas fix nitrogen into the soil. After the first year or two, the wood should release nitrogen and other nutrients as it breaks down, as well as acting as a ‘sponge’ for water.
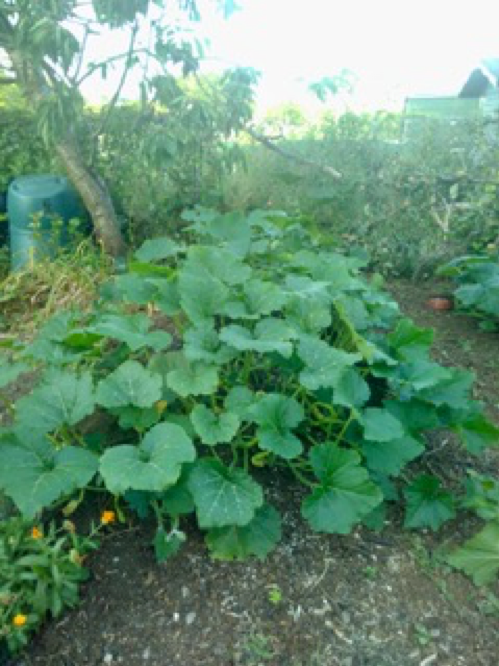
- Step 9: I planted some squash to scramble over the heap, which was still quite steep.
- Step 10: They thrived! Lots of giant squash were harvested!
- Step 11: I liked the process so much I’m building a new Hugel bed. In years to come I imagine my plot will be full of hummocks in various stages of decomposition.
Reflections: I enjoyed the physical work of building the Hugel bed in the cold depths of Winter, and it was satisfying to see how much woody waste I could clear up into a purposeful heap. The first year of a Hugel bed is meant to be less productive, but mine produced brilliant squashes. However, we did have a wetter summer in 2019, so it wasn’t really challenged. All this rain in the Winter of 2019/20 has soaked into the Hugel bed, which is a lot flatter than it was – about half the size. From now on I will simply use ‘no dig’ gardening, and add manure and compost as usual for a raised bed.
I find it fascinating that one of the inspirations for Hugel beds was the experience of archeologists, who can locate the lines of old wooden stockade defences from thousands of years ago, because the trench and the subsequently rotting wood still creates a better environment for plants, and when there is a drought, this shows up as green lines on a field (see image from CBHC/ RCAHMW website). The trenches I dug below my Hugel beds are not as deep, but I hope their beneficial effect lasts as long!

1 Comment