

A pond is a really useful resource in a garden, providing a habitat for important beneficial insects, invertebrates and vertebrates, which are natural hunters of pests in the garden.
There are infinite versions of ponds, differing materials and a wide range of websites offering you support with how to make a pond.
We have done some reading and put ideas into practice to produce a short ‘how to’ guide on making your own wildlife pond. This is not a definitive guide, just offering you some practical tips in a step-by-step format.
Step One: Choosing your pond material
For our pond we chose a flexible PVC liner with protective underlay. Ideally a wildlife pond would be made from puddled clay, but that is a rare resource in chalky Brighton, so we opted for a liner from a professional supplier with a 5-year guarantee. Well protected from sunlight and sharp stones, there’s no reason the liner won’t last a lifetime. Other options include pre-formed plastic liners and rubber liners. Decide on what suits you best depending on the space available, how large you want it and what your budget is.
If, like us, you opt for a flexible liner, you need to work out what size to buy. Many online pond companies provide a calculator to work out this out depending on what size you want your finished pond.
Step Two: Choosing your pond site and size

Choose the place you want to put the pond and mark out the shape and size you have decided on. Using sand to mark the outline is helpful to visualise the final shape. As a general rule, you should choose a sunny site with no overhanging vegetation and the ground should be a level as possible.
A pond needs to be as large as you can accommodate (or afford), but make sure it is at least ½ metre deep to avoid it freezing solid in winter. The pond we made is 2 x 1 x 0.5 metres. Choosing an irregular shaped design is important for wildlife and looks attractive.
Step Three: Digging Out the Pond in Layers


Decide on how you want to place the layers of the pond. A good way to think about it is like an upside down fried egg – the deepest point of the pond need only be relatively small with shallower layers towards the edges. Make sure one edge is very shallow to allow pond fauna to access the water.
One website recommended using vertical (rather than sloping) edges, using a back filling technique over the liner with sub soil. This is possible where you have dug deep enough to hit subsoil – we didn’t go that low for this project. We did dig vertical sides except for our sloping ‘shore’ (seen in the lower part of the picture).
Take care with digging out the soil – plan to do the work over a few days so you don’t injure yourself, or get some friends to help share the work. Also think about where you want to move the excavated soil to – it can be a surprising amount even from a small hole. Keep back a small amount of soil to use to bury the edges of the liner under at the end.
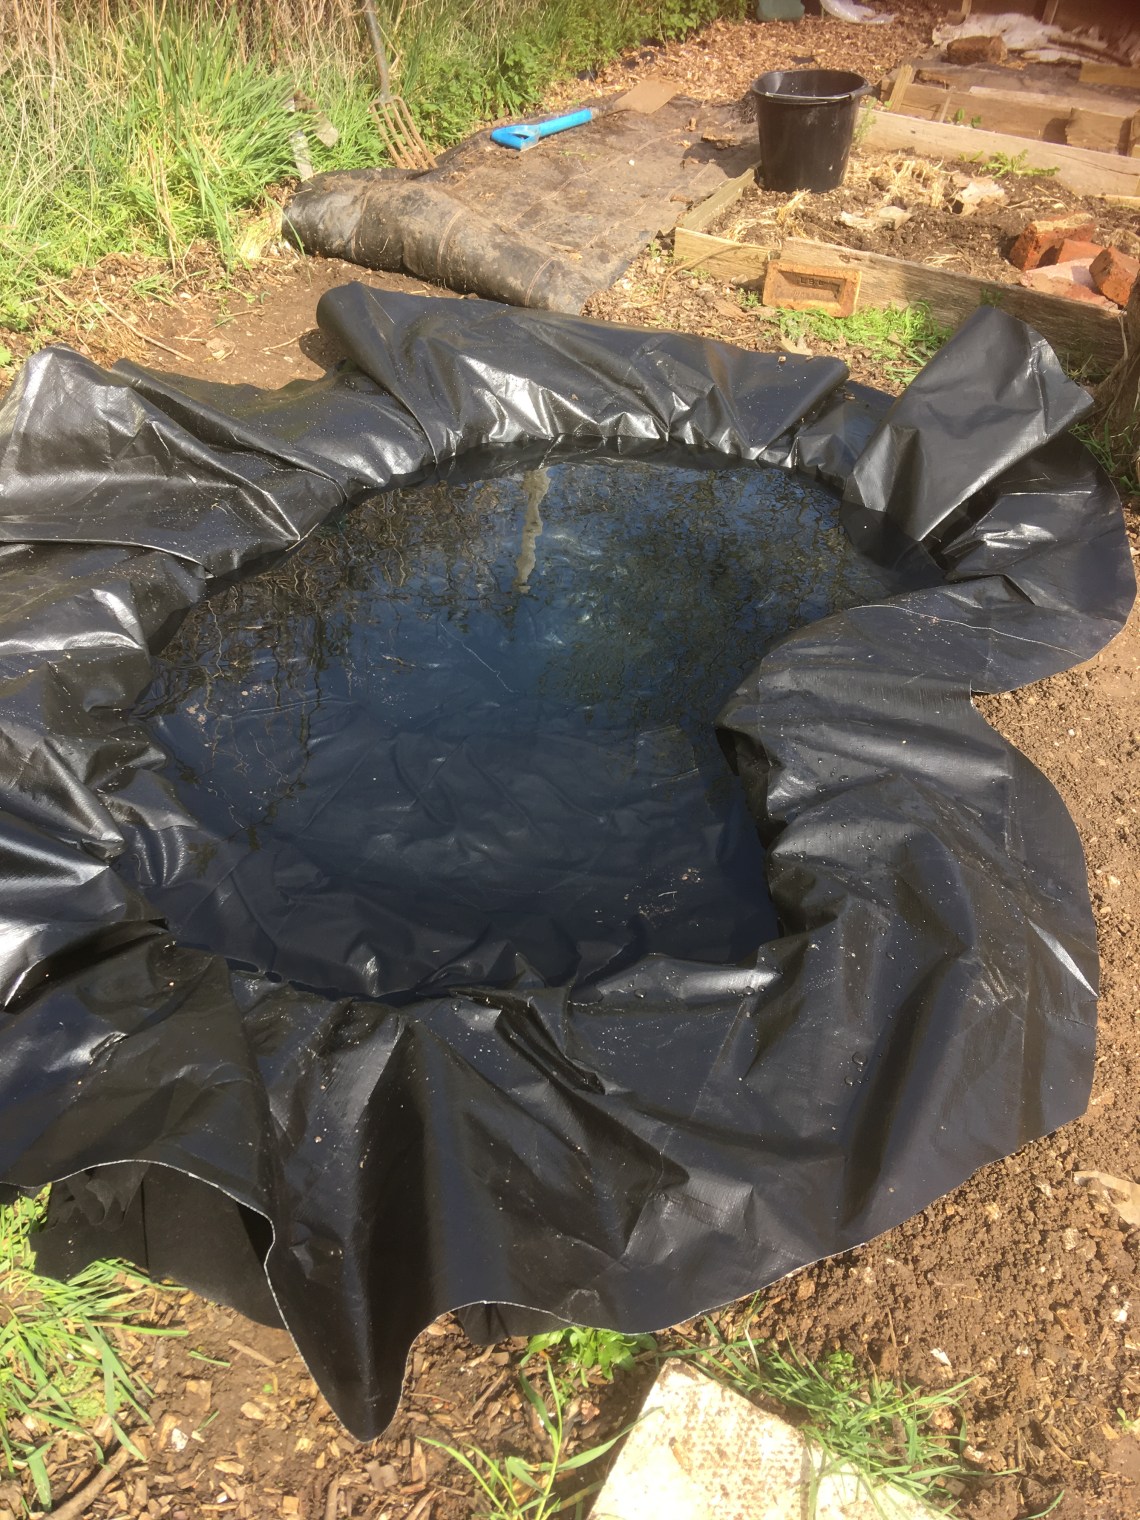
Step Four: Lining the Pond and Filling it


Place the liner protector over the dug out space and carefully mould it to the shape of the pond as closely as possible. Overlay with the liner and do the same. DO NOT CUT THE LINERS YET!
Fill the pond using tap water; this is recommended as it is less nutrient rich than rain water and will help keep out unwanted growth as the pond establishes.
Take care as the weight of the water allows the liner to make contact with the soil – make sure excess liner is carefully pleated and folded to make good contact with the soil. Keep adjusting as it fills.
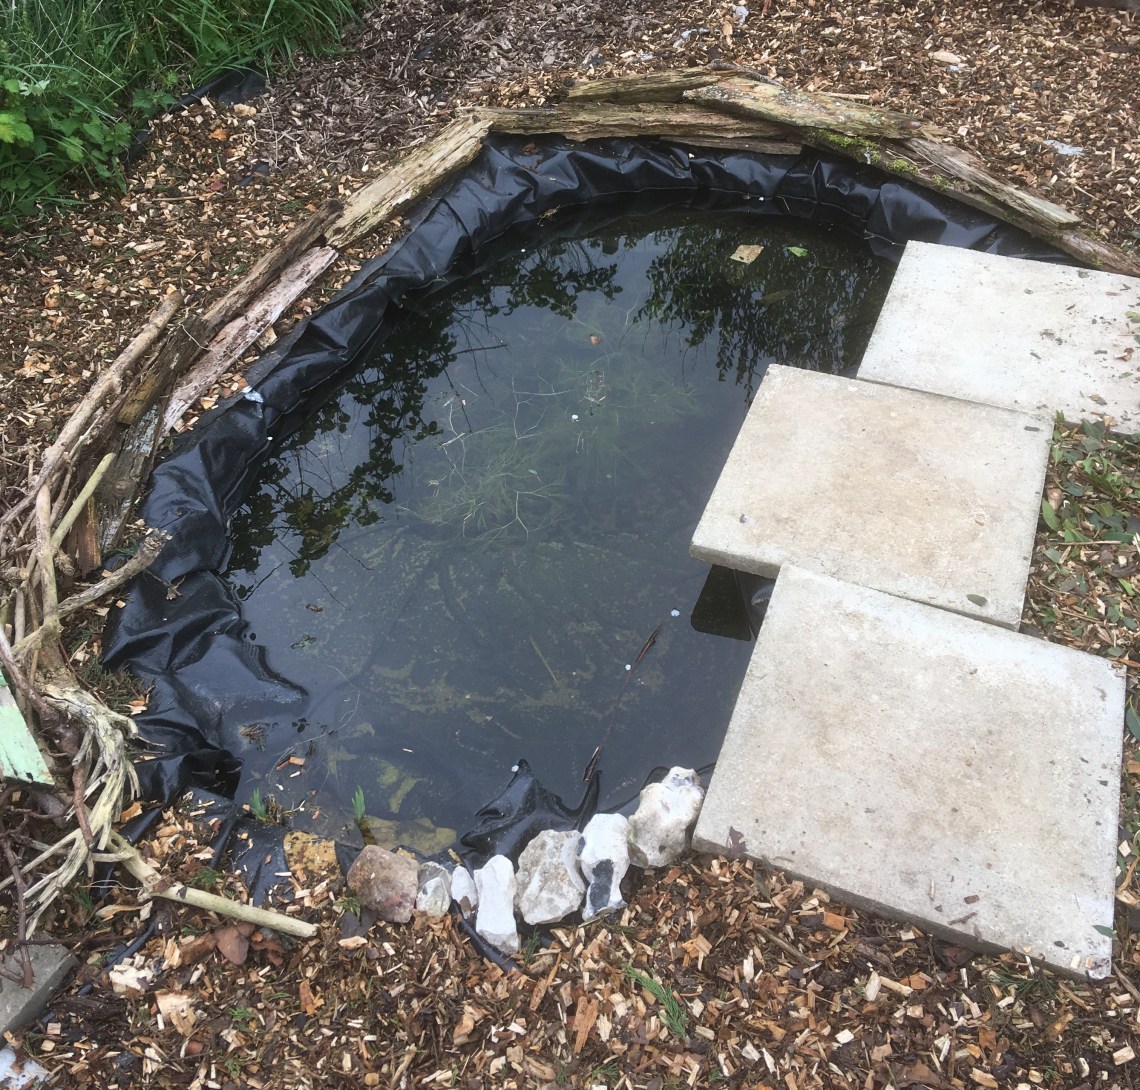
Step Five: Trimming the Lining and Finishing off
Once the pond is filled with water, you can trim and bury the edges. Trim about 30cms from the edge all around the pond. You can secure the liner by placing some of the reserved soil you dug out over the edges. It’s important to shade plastic liners from sunlight and you can use off cuts of the pond liner to cover up where it may be exposed.
Wildlife ponds benefit from a range of materials being placed around and near the pond. We used some paving slabs on one side to provide some shade over the pond and weight to anchor the liner. Don’t use slabs all the way around – they get very hot in the sun and small aquatic fauna entering and exiting the water can die from the heat exposure. We used small rocks and stones around the shallow ‘shore’ edge to create a wetland area, and a habitat pile of cut wood to provide damp, dark environment for toads, frogs and newts. Characterful decayed wood was also used to add interest to the overall effect.
Step Six: Adding Plants

Now you can introduce some water plants to the pond. Make sure you choose these carefully, going for native options and ensuring they won’t get too big for the pond resulting in having to clear the pond of overgrown vegetation. Choose plants for differing water depths, but make sure you have at least one oxygenator and that around 70% of the water surface will be covered by vegetation. This prevents too much nitrogen building up causing algal blooms and other unwanted growth.
Step Seven: Trouble shooting
The pond is likely to go a murky green a few days after filling and planting. Don’t panic, it will soon turn clear once everything has settled down. However, even with the best will in the world, it is likely that you will get unwanted visitors such as duck weed or the dreaded blanket weed. Pull out what you can as it arises and try using barley straw – a packet of straw which magically suppresses overgrowth of blanket weed and other algae without upsetting any of your wanted plants and animals.
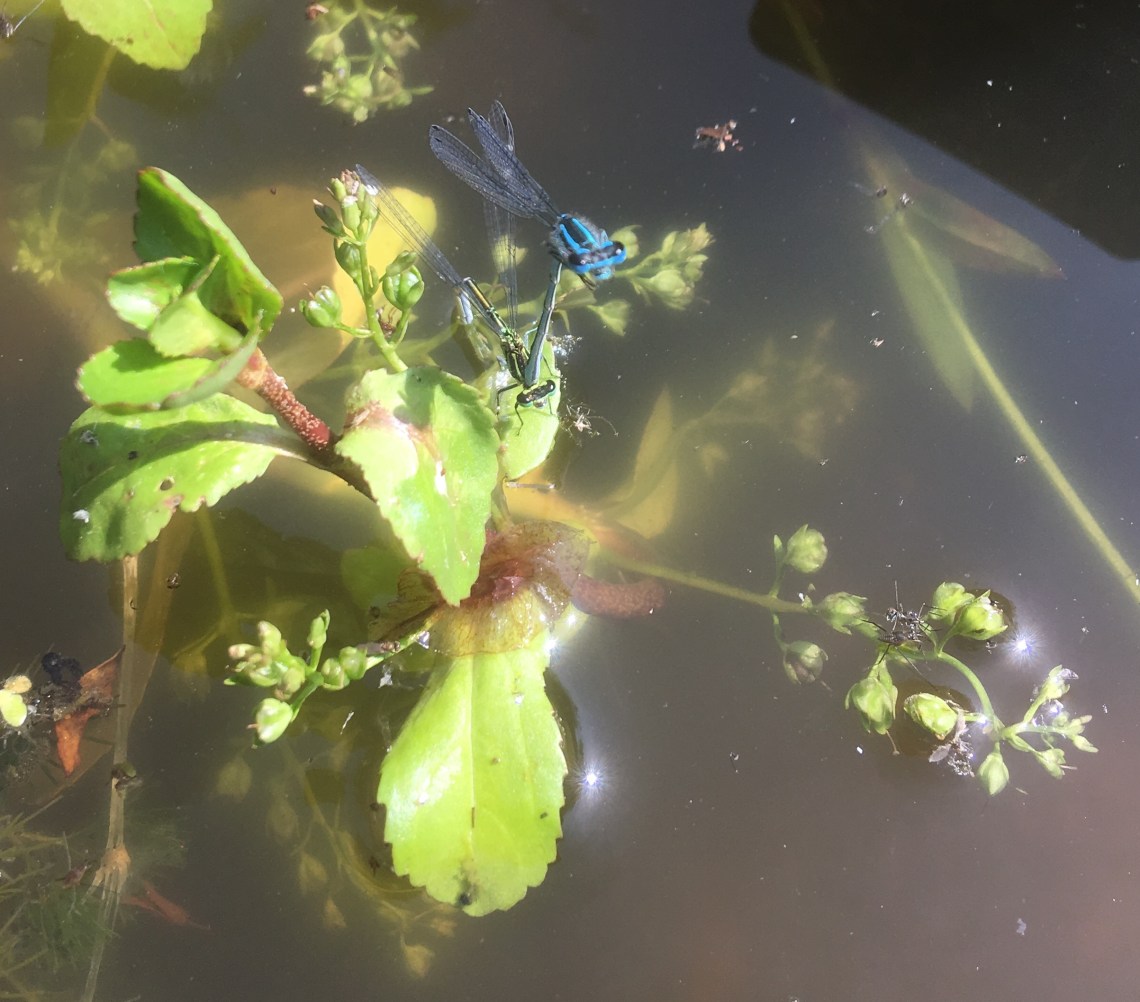
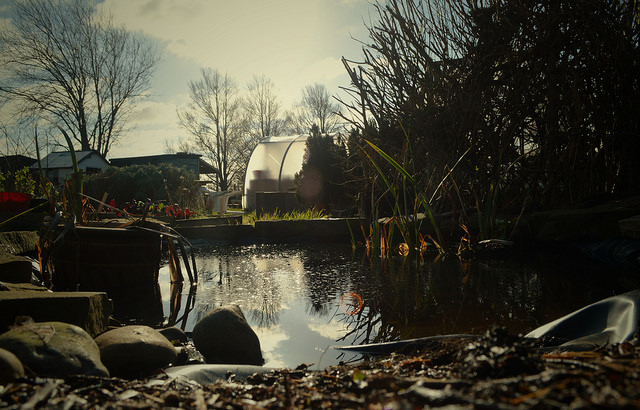
Sit back and enjoy watching the visitors arrive: water boatmen, pond skaters, damselflies, dragonflies, mayflies, caddis flies, water beetles, toads, frogs, newts, and even birds looking for a bath!

1 Comment